
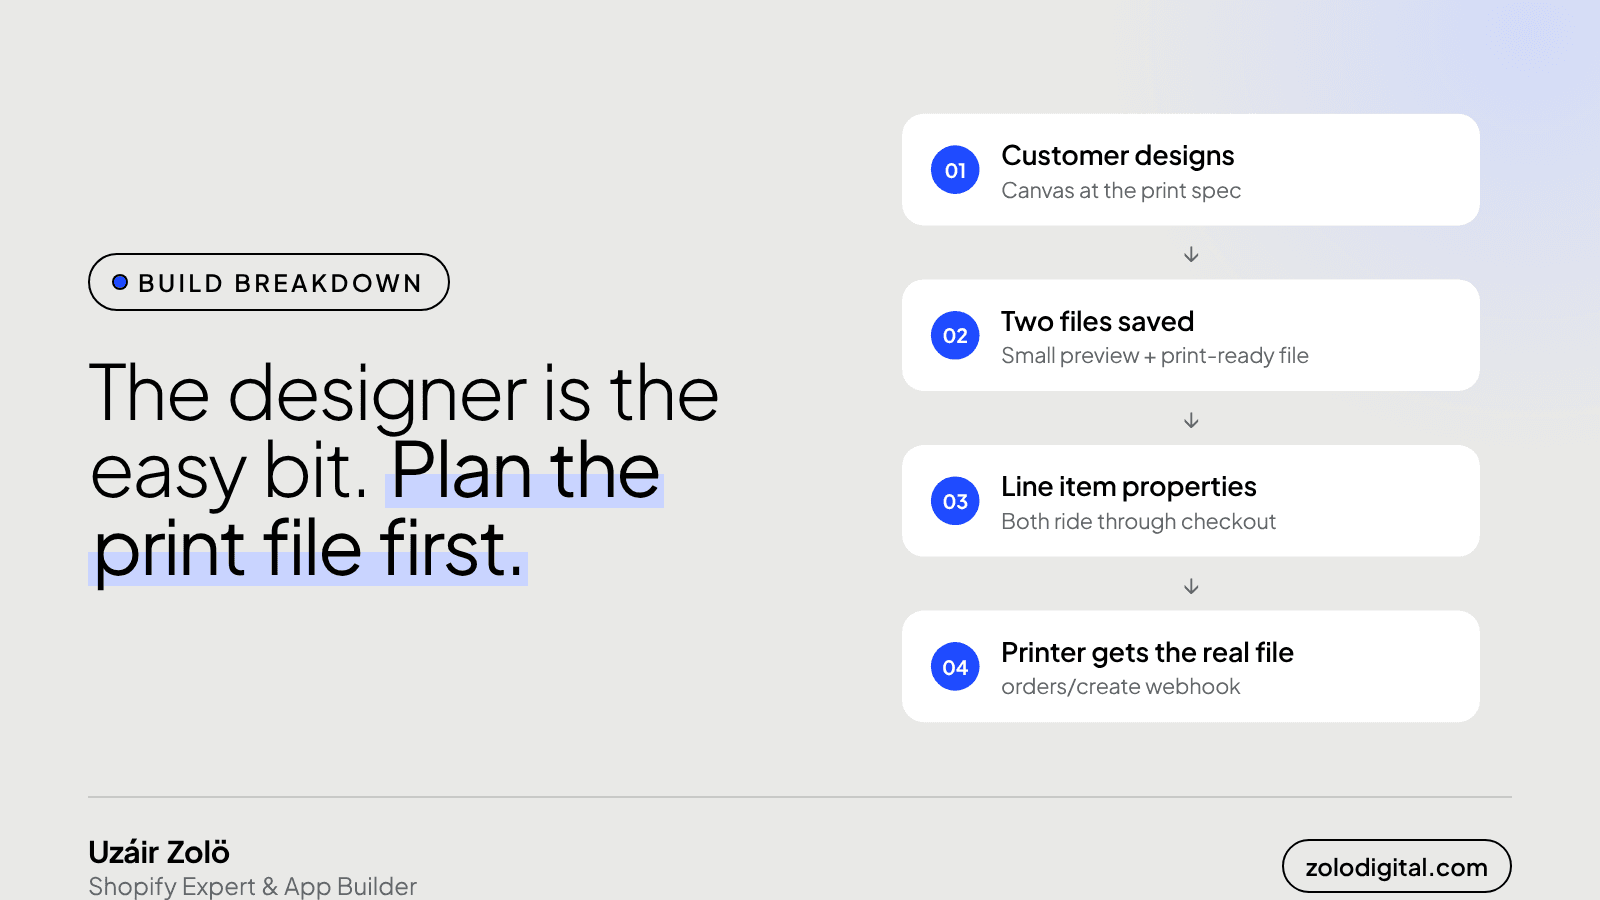
Start from the file your printer needs and work backwards. A print-on-demand product designer on Shopify has four parts: an editor where the customer designs, two saved files (a small preview and a print-ready file), line item properties that carry both through checkout, and a handover that sends the print file to production. Most builds only finish the first.
"Can customers design their own t-shirt?" is one of those questions that sounds like a weekend job. The editor is the weekend. The rest is where the store either works or quietly sends the printer a screenshot.
Below is how I'd approach it on Shopify today. It's the general playbook, not a tour of one client's admin.
What does the printer actually need?
Ask before you write a line of code. Print shops and POD suppliers usually specify:
- Size and resolution: the print area in real units, and the pixel size or DPI that maps to it.
- Format: PNG with transparency, PDF, or SVG for vector work.
- Colour: whether they print from RGB or need CMYK, and how they handle colours outside their range.
- Placement: front, back, sleeve, each as its own file or one file with a layout.
That spec decides your canvas size, your export settings and what the editor is allowed to do. An editor that lets someone place a phone photo across a full A3 print area needs to warn them, not just accept it.
How should the editor work?
Keep it a canvas library (Fabric.js and Konva are common choices) inside a theme app extension or a section on the product page. The customer adds text, uploads an image, picks colours. The editor should:
- Work at the print spec's proportions, scaled down for the screen.
- Show the safe area and the bleed, so text doesn't end up under a seam.
- Warn when an uploaded image is too small for the area it covers.
- Save the design as data (layers, fonts, positions), not only as an image, so you can re-export it later.
Why do you need two files?
Because the cart and the printer want opposite things. The cart wants a small, fast preview the customer recognises. The printer wants a large, exact file nobody should be loading on a phone.
On Add to cart, export both from the saved design data and upload them to your own storage (an app backend, S3, Cloudflare R2). Shopify's Files API works too, but you'll want an app to manage them either way. Don't put image data into the cart itself.
How does the design survive checkout?
With line item properties. Add the preview URL, the print file URL and a design ID to the cart line:
await fetch("/cart/add.js", {
  method: "POST",
  headers: { "Content-Type": "application/json" },
  body: JSON.stringify({
    items: [{
      id: variantId,
      quantity: 1,
      properties: {
        _design_id: design.id,
        _print_file: printUrl,
        Preview: previewUrl,
      },
    }],
  }),
});
Properties starting with an underscore are hidden from the customer in most themes, so _print_file travels with the order without cluttering the cart. Show the preview in the cart and order emails, so the customer sees exactly what they bought.
Two designs of the same variant become two separate lines, because their properties differ. That's what you want.
How does the order reach the printer?
Subscribe to the orders/create webhook in your app. For each line with a _print_file, send that file and the variant details to the printer: their API if they have one, or a tidy email or folder if they don't. Write the result back to the order as a note or tag, so support can see which designs went to production without opening three tools.
Plan for the boring cases: a cancelled order, an edited order, a design that failed to export. Each needs a clear status somewhere a human looks.
What do people get wrong?
- Building the editor first and discovering the export can't meet the printer's spec.
- Sending the preview to print. It looks fine on a phone and blurry on a shirt.
- Storing only an image so a reprint or a resize means asking the customer to design it again.
- Loading the editor on every page. Only load it on products that need it; the rest of the store shouldn't pay for it.
Building one?
If you're planning custom or print-on-demand products on Shopify, this is the kind of build I take on: the editor, the files, the app and the handover. See Shopify app development or get in touch with what your printer needs, and we'll work backwards from there.


